Introduction
These are detailed instructions for converting a Raspberry Pi Zero 2W + Carlinkit device into a fully functional CarPlay/Android Auto system. This also serves as documentation of a long journey that I have gone with this setup, including lessons learned along the way.
The guide may also benefit beginners working on other Raspberry Pi projects, as it covers several general setup procedures commonly needed elsewhere.
Further will be all sequential steps required to get the set up. You should follow them in order unless you're looking for help with a specific part. Each page is designed to include complete, standalone instructions for each individual step. Step 0: The story can be skipped.
Warning
This is work in progress. I will slowly add content to this guide
Steps
- The story
- Flashing Raspberry Pi OS Lite
- Custom partitions: move /home to own partition, mount, first boot
- Connect to WIFI using wpa_supplicant and systemd-networkd
- Set up FastCarPlay Carplay and Android Auto receiver: get, compile and configure
- Optimise RPI boot: remove unnecessary services, overclock sd card, boot configuration
- Wifi connection and hotspot scripts
- [Overlay file system](#7-Overlay- FS)
- Additional hardware: AUX TV Output, I2S Audio
- Extra: Set up minimal desktop environment with JVM and ST
Prerequisites
This guide is build on following hardware:
- Car Head Unit with HDMI or Analog input - Or any other device that you will use as screen.
- Raspberry Pi Zero 2 W - This guide is specifically written for the Raspberry Pi Zero 2 W. Other models may require different configurations.
- MicroSD Card - I'm using 64GB UHS-II card for performance, you should be ok with minimum 16GB, Class 10 card.
- Autokit Adapter - CPC200-CCPA CarPlay Dongle. Any dongles that work with Autokit andorid application should be ok.
- USB OTG Adapter - Need to connect dongle, keyboard and mouse.
- 5V Power Supply - A reliable 5V, 2.5A power supply is essential for stable operation.
- Optional: I2S Sound Card - I'm using PCM5102A I2S player module. Any RPI compatible I2S should work.
Important
- Throughout this guide, the username carplay will be used for the Raspberry Pi user account. You need to adjust commands if you are using different one.
0 Story
The idea of this project came when I was looking in a way to get apple car play for my old car. I have a special video input that allows to connect external media with RCA, but generally this can be used on any car that have some source of RCA input. In most cases reverse camera are connected as same RCA video input. So with a little bit of creativity this can be implemented on wide area of cases.
I wanted to have something minimalistic and fast, that I can seamlessly integrate as a ready made module. My research bring me to the Autobox dongle that promised to get Carplay for any Android device. At that point of time I had Orange PI at hand that can run Android OS, so my plans were just to plug and play. But things doesn't went quite smooth and I found a problems with connection RCA to Orange PI as well as I didn't want to have the whole Android system to boot for only one application.
From there I started to investigate other options to use the dongle with Linux and found electric-monk's pycarplay implementation. Also i decided to get really minimalistic and try to run everything on Raspberry Pi Zero 2W that I have already successfully connected to my car with RCA. But the problem came that all of the implementations were not using hardware decoding or required other frameworks that was not possible to run on 512 MB or RPI Zero 2W. So after several failed attempts to get smooth Carplay on RPI and digging into sources I decided to write own piece of software with something compilable to binary that will be CPU and Memory efficient and use HW decoding.
After some coding, protocol digging and learning new thing I have ended up with this project. Also I decided to document all the steps that will allow you to get from 0 to full kiosk mode Carplay solution, cause in attempts to build a solid minimalistic system that I want, I figure out that there are no good guidance on setting up a lot of things that for me looks essential. Or if the steps are described a lot of "details" what settings are doing and why they needed are missing. So I hope that this guide will help not only people who are building FastCarPlay but it will also allow others to learn how to set up simple and effective kiosk single app solutions with RPI with minimal CPU/Memory usage.
1 Flashing
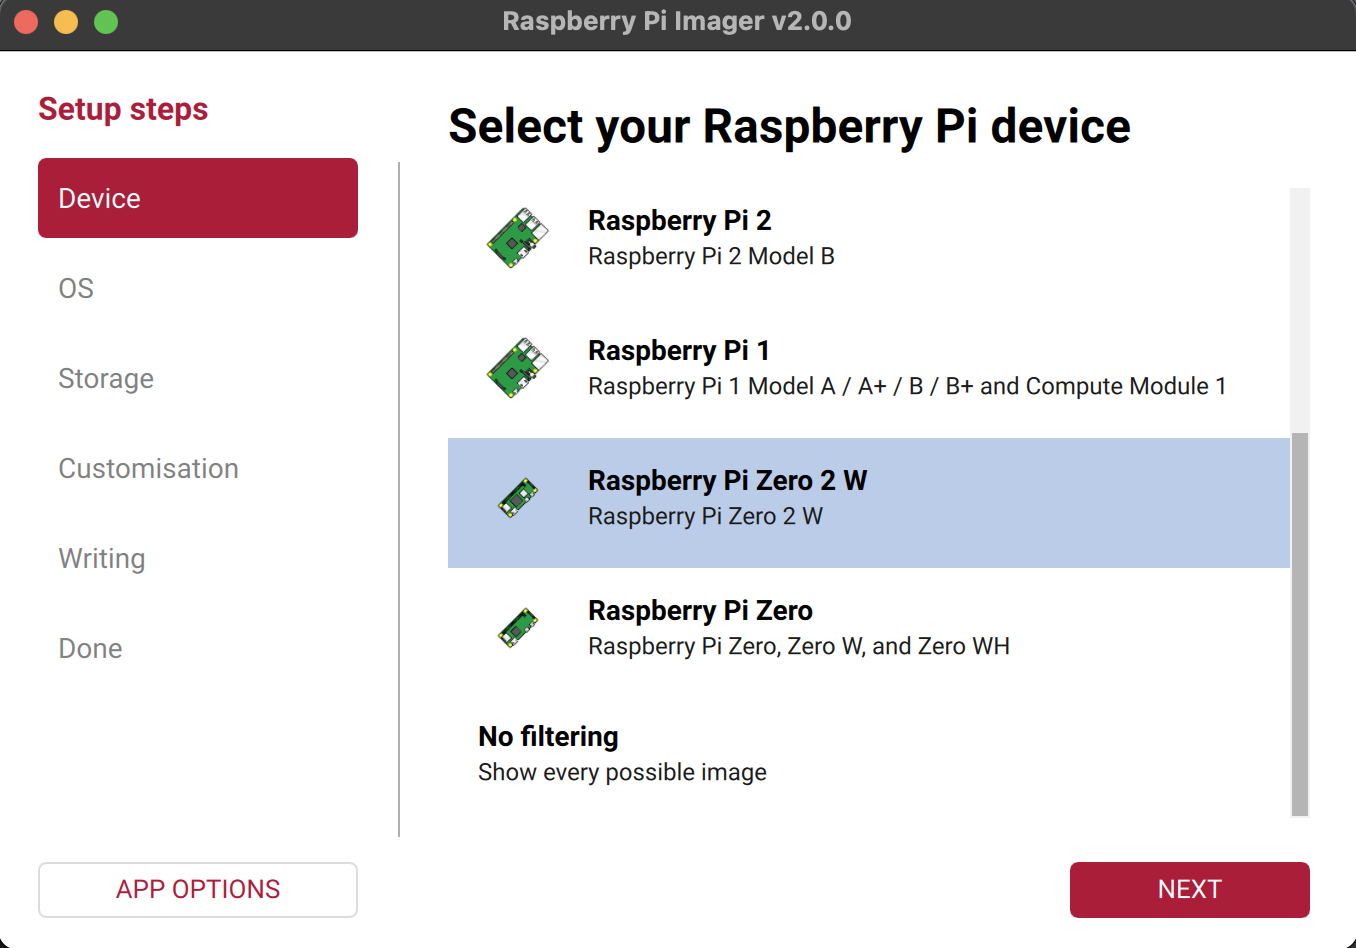
Download and install Raspberry Pi Imager. Open it and choose your Raspberry Pi model.
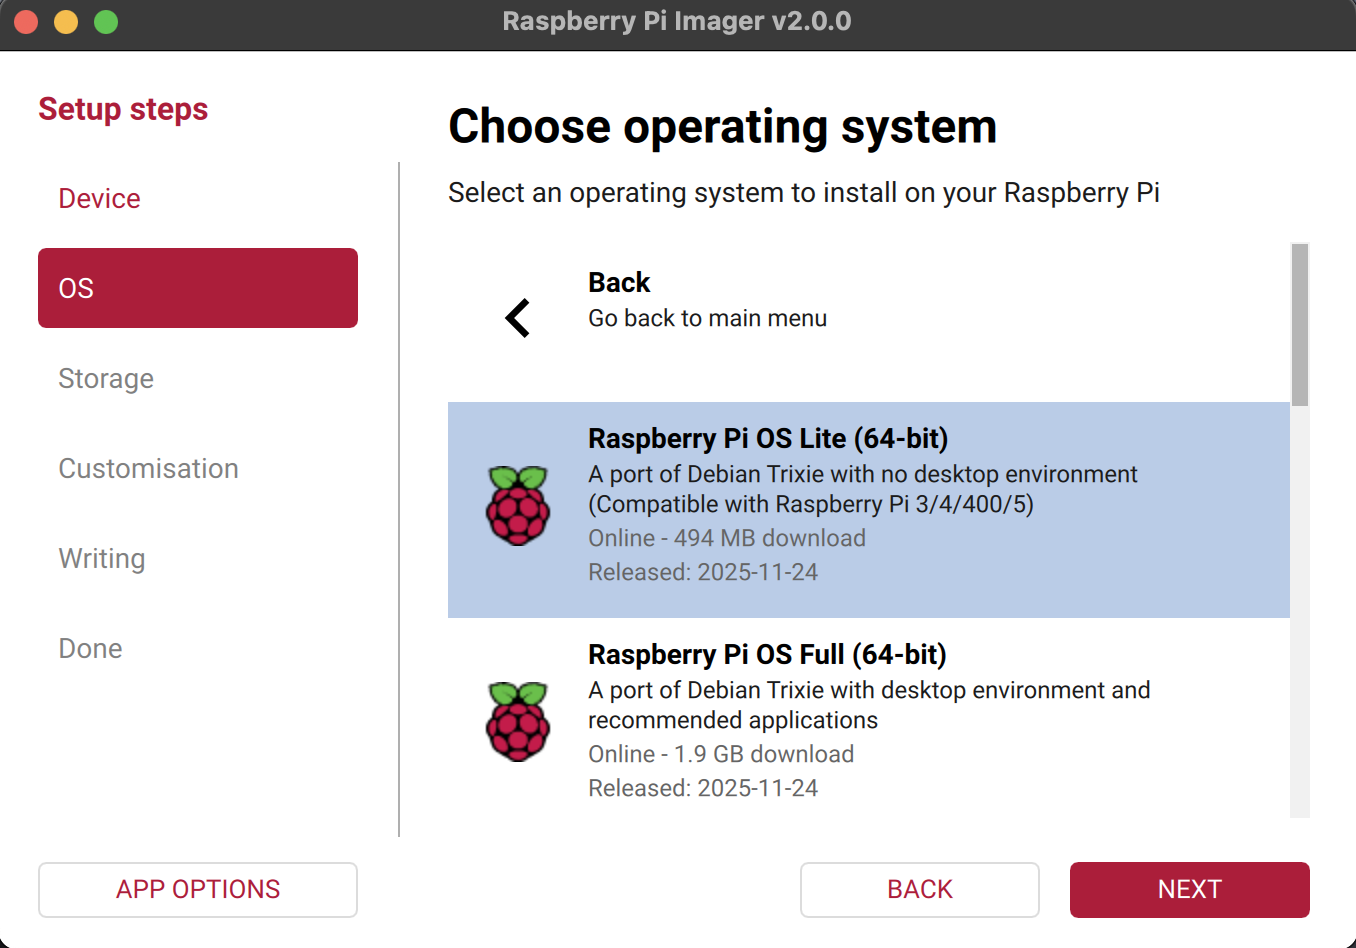
Choose Raspberry Pi OS (other) and select Raspberry Pi OS Lite (64-bit). This provides a minimal Debian-based system with lower memory footprint.
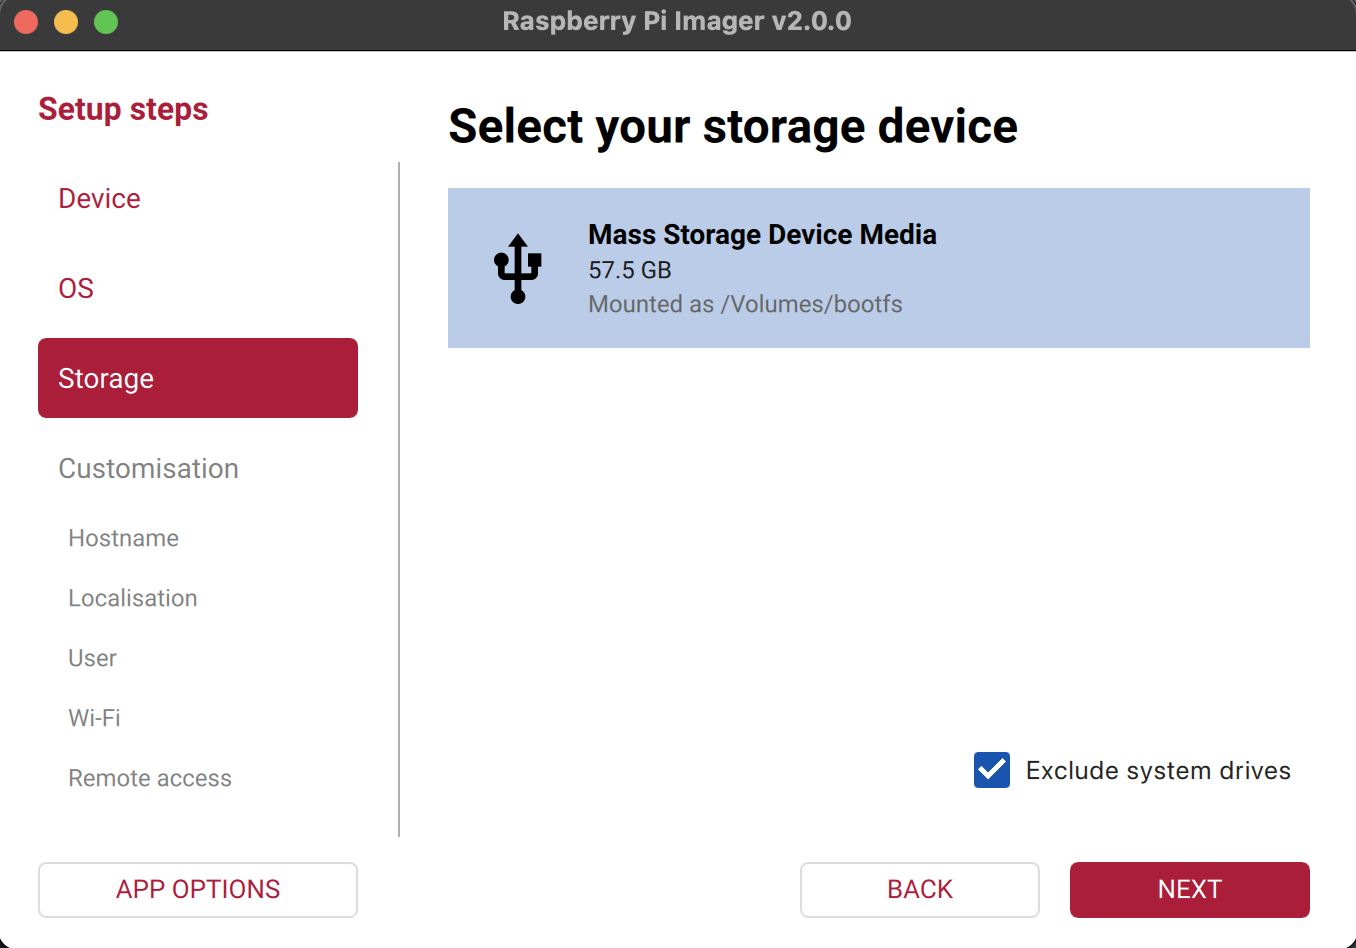
Select the target micro-SD card you have inserted.
Note
There was a bug with Customisation step at the version 2.0.0 that do not create user properly. If customisation is working, set up hostname and locale as needed. Define the username and password. We will connect RPI directly to screen and keyboard and configure networking manually later, so leave the Wi-Fi section empty settings empty. SSH also can be enabled so you can connect to the device later. Password authentication is sufficient for basic use and avoids managing key files, though public key authentication provides stronger security. In this setup the system won’t be connected to the internet except when manually managed or updated, so password authentication is sufficient.
Skip customisation step to set up accounts and locales on first boot.
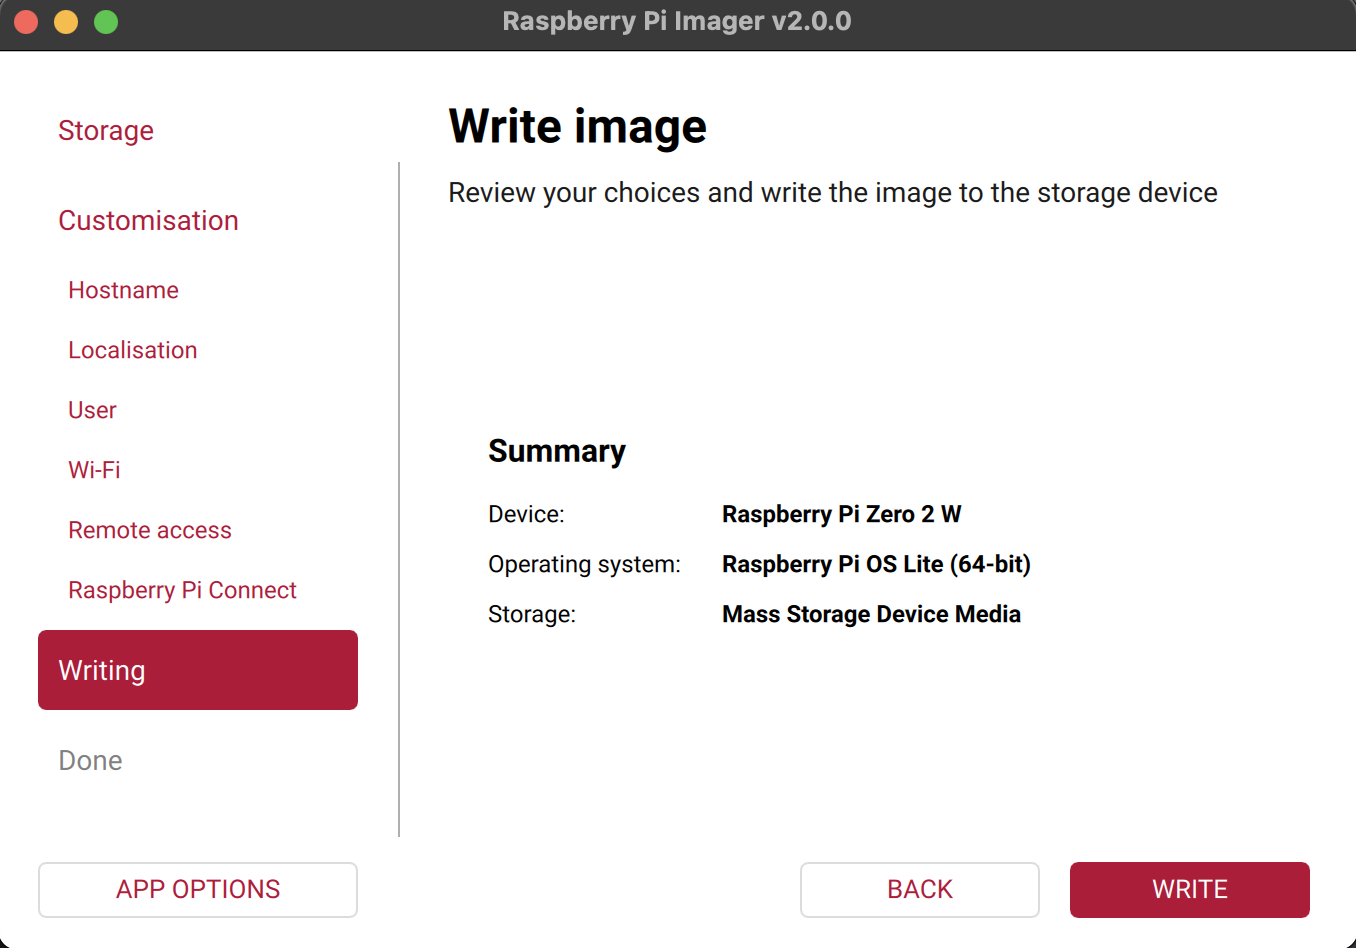
Review the configuration and write the image to the SD card. Wait for the process to finish.
2 Partitioning
Tip
This optional step prepares the system for an overlay filesystem, allowing the core system to run in read-only mode while keeping the user directory writable. If you don’t need an overlay setup, you can skip this and boot the Pi normally. The SD card partitions will be expanded automatically on first boot.
In this step we create additional SD-card partition for the home folder. This allows the OS partition to run in read-only mode using an overlay filesystem, reducing write operations and improving stability and protection. At the same time, data can still be written to /home without disabling the overlay for persistent files or frequent updates. Also it will be possible to put swap file under /home folder.
Partitioning with gparted
You will need a Linux machine or a virtual machine running any Linux distribution. Install gparted on your system (use apt on Debian-based systems):
sudo apt install gparted
Important
You need to perform partitioning after flashing the image to the SD card. On the first boot, RPI OS will expand the initial partition to fill the SD card, and shrinking it afterward is more complicated and risky.
Plug your SD card in, or attach it to the virtual machine. Open gparted and select the SD card. You should see the bootfs and rootfs partitions, followed by free space.
bootfs contains the bootloader and firmware files needed for the system to start. rootfs holds the main filesystem with the OS and applications.

First, increase the size of rootfs. Open Partition → Resize/Move and set the new partition size. About 8 GB is sufficient for a minimal setup.

Next, create a partition for /home. Choose Partition → New and set Free space following for swap (at least 512 MB on an RPI Zero 2W). Set the filesystem to ext4, enter a label such as homefs.

Review the changes and apply them

First boot
Insert the SD card into the Raspberry Pi, connect the HDMI cable and keyboard, then apply power. If everything is correct, the rainbow screen will appear and the Pi will begin booting, followed by the setup process. Choose the keyboard layout and create a username and password. After a short time, a login prompt will appear. Enter the username and password you created to access the terminal.
Mount partitions
Next, we need to configure the system to mount our new homefs partition as home. First identify the partitions:
blkid

In the output, locate the partition with label LABEL="homefs". Note its PARTUUID and /dev/device.
We need to copy existing /home directory to a new partition. Mount the homefs partition using /dev/device name:
sudo mkdir /mnt/home
sudo mount /dev/mmcblk0p3 /mnt/home
Copy the contents of /home to the new partition:
sudo rsync -aX /home/ /mnt/home/
- -a - archive mode, preserves symbolic links, permissions, timestamps, ownership, and devices.
- -X - preserves extended attributes such as ACLs and SELinux context.
Edit the fstab file to configure automatic mounting of the new partitions:
sudo nano /etc/fstab
At the end of the file, add an entry for the homefs partition using its PARTUUID
PARTUUID=your-home-partuuid /home ext4 defaults,noatime 0 2

Rename the current /home and create a mount point than reboot:
sudo rm -r /home
sudo mkdir /home
sudo reboot
Check that partitions are mounted correctly with lsblk and remove mount point:
lsblk
sudo rm -r /mnt/home/

3 WPA-Supplicant
Tip
To connect to the internet, we will use wpa-supplicant. It is lighter than NetworkManager and will also be used later for scripting. You can use other methods of connection but this will be needed for Wifi scripts (step 10).
First, set the Wi-Fi country in the Raspberry Pi configuration:
sudo raspi-config
Navigate to Localisation Options → WLAN Country, select your country. Also enable SSH in Interface Options → SSH.
Next disable NetworkManager loading and stop it:
sudo systemctl disable NetworkManager
sudo systemctl stop NetworkManager
Check whether the wireless interface is enabled:
rfkill list
This shows the state of all radio devices. If the wireless adapter is marked as Soft blocked: yes, the system has disabled it in software, which prevents the Wi-Fi interface from being used.

If it is blocked unblock it with:
rfkill unblock wlan
Identify the wireless interface so wpa-supplicant can target the correct device. List wireless interfaces and their status:
iwconfig
Note
In my case the wireless interface name is wlan0, you need to adjust following commands according to your wireless interface name
Next, create the wpa-supplicant configuration file. You need the Wi-Fi network name (SSID) and password. If either contains spaces, place them in quotes. Generate the configuration and write it to the appropriate file (note that file name includes the interface name). Replace WifiSSID and WifiPassword with your own values:
wpa_passphrase WifiSSID WifiPassword | sudo tee /etc/wpa_supplicant/wpa_supplicant-wlan0.conf
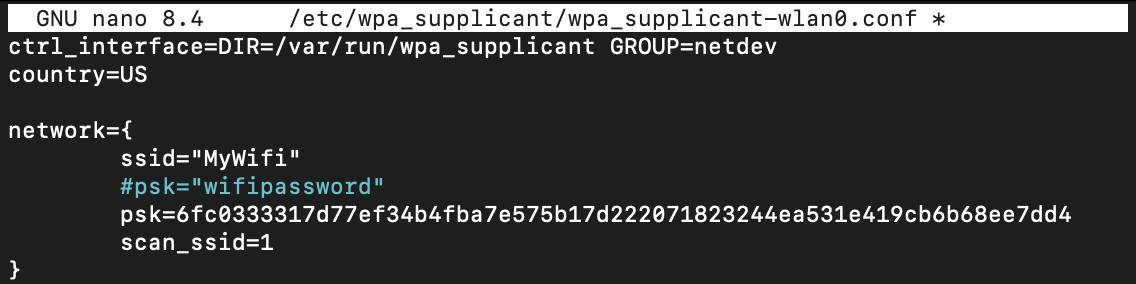
Next, edit created configuration file:
sudo nano /etc/wpa_supplicant/wpa_supplicant-wlan0.conf
Add the following lines at the beginning of the file, replacing US with your country code as needed:
ctrl_interface=DIR=/var/run/wpa_supplicant GROUP=netdev
country=US
Note
In case of hidden network you need to add scan_ssid=1 inside network section
- ctrl_interface - specifies the directory where wpa-supplicant creates its control interface for communication with other programs. The
GROUP=netdevpart sets permissions so users in thenetdevgroup can manage the interface. This is needed so that other programs and users can interact with wpa-supplicant to manage Wi-Fi connections without requiring full root access. - country -sets the Wi-Fi regulatory domain according to the country
To enable DHCP on wireless interface, create or edit the network configuration file:
sudo nano /etc/systemd/network/25-wlan.network
Add the following content, replace wlan0 with your interface name:
[Match]
Name=wlan0

[Network]
DHCP=yes
# Optional DNS server
DNS=8.8.8.8
Next we need to restrict access to the configuration file so only root can read/write it. Enable and start the wpa-supplicant service for the wireless interface. Start the systemd network manager to handle DHCP and network configuration. Finally disable and stop the default wpa-supplicant service to avoid conflicts with the interface-specific service:
sudo chmod 600 /etc/wpa_supplicant/wpa_supplicant-wlan0.conf

sudo systemctl enable wpa_supplicant@wlan0.service
sudo systemctl start wpa_supplicant@wlan0.service

sudo systemctl enable systemd-networkd.service
sudo systemctl start systemd-networkd.service

sudo systemctl disable wpa_supplicant.service
sudo systemctl stop wpa_supplicant.service
Bring up the wireless interface:
sudo ip link set wlan0 up
Check the status of the wireless interface:
iwconfig
ifconfig
If the wireless connection is working, update the system and then reboot:
sudo apt update
sudo apt upgrade
sudo reboot
Now you can connect to your raspberry pi with ssh, replace 10.0.0.10 with ip of you raspberry from ifconfig command:
ssh carplay@10.0.0.10
4 FastCarPlay
Tip
In this section we are going to set up FastCarPlay and configure it to use in KIOSK mode with automatic start on system boot
Iinstall the libraries for building FastCarPlay:
sudo apt install --no-install-recommends build-essential git xxd libsdl2-dev libsdl2-ttf-dev libavformat-dev libavcodec-dev libavutil-dev libswscale-dev libusb-1.0-0-dev libssl-dev
Install libraries for running FastCarPlay:
sudo apt install --no-install-recommends ffmpeg libsdl2-2.0-0 libsdl2-ttf-2.0-0 libusb-1.0-0 libssl3
Clone repository and build FastCarPlay:
git clone https://github.com/niellun/FastCarPlay.git
cd ./FastCarPlay
make clean
make release -j2
- Use -j2 flag to tell compiler to use 2 parallel threads for building. Remove this if you running out of memory.
Configure USB access
We need to allow USB access to CPC200-CCPM Carlinkit Autobox dongle. Connect the dongle to a USB port and list the connected USB devices:
lsusb
Identify the line that corresponds to your dongle. For example, mine appears as:
Bus 003 Device 066: ID 1314:1520 Magic Communication Tec. Auto Box
You need the Vendor ID and Product ID, which appear after the ID field in the format <vendor>:<product>. In the example, the vendor is 1314 and the product is 1520, and both values are in hexadecimal form.
Create the udev rule so the system applies the correct permissions to the dongle. Otherwise application will not be able to communicate with it. Replace the ATTRS{idVendor}== and ATTRS{idProduct}== values with the IDs from lsusb:
echo 'SUBSYSTEMS=="usb", ATTRS{idVendor}=="1314", ATTRS{idProduct}=="1520", GROUP="plugdev", MODE="0660"' | sudo tee /etc/udev/rules.d/50-carlinkit.rules
Add the target user to the plugdev group so that user can access the device without elevated permissions. Reload and trigger udev so the new rule takes effect immediately:
sudo usermod -aG plugdev carplay
sudo udevadm control --reload-rules
sudo udevadm trigger
Configure FastCarPlay
Create a copy of the settings in /conf directory so it will persist through updates and edit it:
mkdir ./conf
cp ./settings.txt ./conf
nano ./conf/settings.txt
Configure settings according to your needs, remember to uncomment lines that you are changing. Set up vendor-id and product-id according to vendor id and product id from from lsusb. You need to convert value from hexidecimal to decimal. For example 0x1314:0x1520 will be 4884:5408. Modify other settings according your preferences. You can test how it works directly from console:
./out/app ./conf/settings.txt
Press Q to exit the program and CTRL+ALT+F1 to return to console.
If everything works as expected, make FastCarPlay start up with the system with automatic login and starting session on terminal 7 (default terminal used for X11). Create systemd unit:
sudo nano /etc/systemd/system/carplay.service
Put following unit configuration. Remember to replace user name and paths:
[Unit]
Description=Auto-start FastCarPlay on system boot
DefaultDependencies=no
After=home.mount
Requires=home.mount

[Service]
Type=simple
User=carplay
WorkingDirectory=/home/carplay
PAMName=login
Environment=XDG_SESSION_TYPE=x11
TTYPath=/dev/tty7
StandardInput=tty
UnsetEnvironment=TERM
UtmpIdentifier=tty7
UtmpMode=user
StandardOutput=journal
StandardError=journal

ExecStartPre=/usr/bin/chvt 7
ExecStart=/home/carplay/FastCarPlay/out/app /home/carplay/FastCarPlay/conf/settings.txt
Restart=on-failure
RestartSec=2s

[Install]
WantedBy=multi-user.target
Enable the service and test it with start:
sudo systemctl enable carplay.service
sudo systemctl start carplay.service
Now FastCarPlay should automatically start after system boot. You need to press Q and CTRL+ALT+F1 to close it and return to console.
Optional multichannel audio
By default, the system uses ALSA as the audio manager. The limitation of ALSA is that it can only handle one audio output at a time. This means that if you are playing music and want navigation prompts or other system sounds to play simultaneously, only one of the audio streams will be heard, while the other will be blocked.
To overcome this limitation, you need a more advanced sound system that can mix multiple audio streams together. One such option is PulseAudio, which acts as a sound server capable of handling multiple simultaneous audio outputs, routing audio to different devices, and providing better overall control of audio streams.
Install PulseAudio with the following command:
sudo apt install --no-install-recommends pulseaudio
Enable Libliftoff Hardware Overlays
To improve graphical performance on the Raspberry Pi, you can enable libliftoff hardware overlays. It allows the GPU to handle composition and hardware overlays efficiently. By enabling it, graphical elements, video playback, and user interfaces are rendered directly by the GPU instead of relying on software rendering. This reduces CPU load, prevents screen tearing, and improves overall responsiveness. This can be done via raspi-config:
sudo raspi-config
Navigate to: Advanced Options → Libliftoff →Enable libliftoff hardware overlays.
5 Optimise boot
Tip
Now when we have system running we want the system to start as quickly as possible and minimise running services to conserve limited RAM. Also we want to hide boot process from screen.
Disabling services
The system starts up a lot of services that we do not need in our set up. You can check which services are taking the longest to start by systemd-analyze and check list of enabled services:
systemd-analyze
systemd-analyze blame
systemctl list-unit-files --type=service
We want to disable all not needed services to get more RAM and to reduce the time from power up to showing FastCarPlay application GUI. Here is list of services I disabled on my Raspberry Pi. Adjust it according to your own needs, and add or remove services based on your system, usage, and observed boot times.
Network wait service delays boot until network is fully online, disable and mask it because system is going to run without internet:
sudo systemctl disable systemd-networkd-wait-online.service
sudo systemctl mask systemd-networkd-wait-online.service
Disable Raspberry Pi bootstrap and cloud services, they are not needed after first boot and we will not use cloud management:
sudo systemctl disable cloud-config.service
sudo systemctl disable cloud-final.service
sudo systemctl disable cloud-init-local.service
sudo systemctl disable cloud-init-main.service
sudo systemctl disable cloud-init-network.service
Disable other services that are not needed:
sudo systemctl disable ModemManager.service
sudo systemctl disable bluetooth.service
sudo systemctl disable avahi-daemon.service
systemctl mask polkit.service
sudo systemctl disable regenerate_ssh_host_keys.service
sudo systemctl disable rpi-eeprom-update.service
sudo systemctl disable e2scrub_reap.service
sudo systemctl disable sshswitch.service
sudo systemctl disable keyboard-setup.service
sudo systemctl mask systemd-hostnamed.service
sudo systemctl mask systemd-binfmt.service
sudo systemctl mask systemd-ask-password-console.path
sudo systemctl mask systemd-ask-password-wall.path
- ModemManager - if you don’t use a cellular modem.
- Bluetooth service - unnecessary if you don’t use Bluetooth.
- Avahi Daemon - mDNS/Bonjour, unnecessary in headless setups.
- Polkit - authorization framework, often unnecessary in CLI-only setups.
- Regenerate_ssh_host_keys - used to generate new SSH host keys, usually on first boot. Disabling it prevents automatic regeneration of SSH host keys at boot. It’s safe to disable once the initial keys are generated.
- Rpi-eeprom-update - checks and applies Raspberry Pi firmware/bootloader updates at boot.
- E2scrub_reap - performs LVM/ext4 metadata scrubs, mostly unnecessary on SD cards.
- Sshswitch - manages automatic switching of SSH access modes on Raspberry Pi OS. Disabling it stops the system from automatically enabling or switching SSH access at boot. This is safe on systems where SSH configuration is static or manually managed.
- Keyboard-setup - configures keyboard layout at boot, not needed on headless or if you use default US keyboard layout.
- Hostname daemon - host naming service. This service manages the system’s hostname and related network identity. We are not using host names and networking.
- BinFmt - binary format support for running foreign binaries (like non-native executables). FastCarPlay only runs native ARM binaries, so this service is not needed.
- Password console - prompts for passwords on the console during boot or service startup. We do not require user interaction for encrypted volumes or services, so these prompts can safely be disabled.
- Ask Password Wall - prevents password prompts broadcasted to all logged-in users. We do not have multiuser in our system.
Additional tweaks
Since we are running a fixed set of software and already, we can remove ZRam swap to speed up boot:
sudo apt purge rpi-swap
sudo apt autoremove --purge
For boot tweaks and configurations for edit cmdline.txt:
sudo nano /boot/firmware/cmdline.txt
Add following to the end of the line
quiet loglevel=0 rd.udev.log_priority=3 vt.global_cursor_default=0 mitigations=off maxcpus=2
We want to disable boot messages on the screen. This is not just reduce boot time a bit but also needed for system to start nicely without revealing everything underline:
- quiet - reduces the amount of boot messages displayed on the screen. This hides unnecessary logs to make boot cleaner and faster.
- loglevel - sets the kernel log verbosity.
0shows only critical messages (panic or emergency), suppressing less important logs. This further reduces console clutter during boot. - rd.udev.log_priority - controls the logging level of the udev device manager during the initramfs stage.
3corresponds to “error” level, so only udev errors are shown. - vt.global_cursor_default - hides the virtual terminal cursor.
Other options are:
- mitigations - disables CPU security mitigations (like Spectre/Meltdown patches). This improves performance at the cost of exposing vulnerabilities, which is acceptable in a controlled system without untrusted code. Reduce kernel boot time and improve performance.
- maxcpus - limits the number of CPU cores in use. This reduce power consumption and thermal load. 2 cores should be enough to running the system.
Customize Raspberry Pi hardware behavior. Open the firmware configuration file for editing:
sudo nano /boot/firmware/config.txt
Change following settings to 0:
camera_auto_detect=0
auto_initramfs=0
- camera_auto_detect - disables automatic detection of the camera module. Speeds up boot by skipping camera initialisation.
- auto_initramfs - disables automatic searching for a matching initramfs, reducing boot time with default kernels.
Add additional tweaks:
# Set GPU memory
gpu_mem=64

# Disable bluetooth
dtoverlay=disable-bt

# Disable the rainbow splash screen
disable_splash=1

# Set the bootloader delay to 0 seconds. The default is 1s if not specified.
boot_delay=0

# Disable PoE HAT fan control via I²C (reduce boot time)
disable_poe_fan=1

# Prevent reading HAT EEPROM on boot
force_eeprom_read=0

# Overclock the SD card interface by 100 MHz
dtparam=sd_overclock=100

# Enable turbo mode (max CPU/GPU frequency) for first 30 seconds after boot
initial_turbo=30
6 Wifi scripts
Tip
Our setup does not require a constant Wi-Fi connection, so we will manually enable Wi-Fi only when needed to install updates or create a hotspot to access the Pi for logs or control without internet. To achieve this, we will create two scripts:
- Connect to wifi using WPA Supplicant (step 3)
- Start wifi hot spot using hostapd with DHCP service using dnsmasq.
Additionally, we will add these scripts to the JWM mouse menu (step 5) for quick access.
The scripts will be stored in the /opt/scripts directory. First, create this directory:
sudo mkdir /opt/scripts
WIFI hotspot with DHCP
We will use hostapd to configure the hotspot and dnsmasq to provide DHCP addresses to connected clients. First, install both packages:
sudo apt install --no-install-recommends dnsmasq hostapd
Since we will run these services manually, disable dnsmasq from starting automatically and stop it:
sudo systemctl disable dnsmasq.service
sudo systemctl stop dnsmasq
Next, configure the Wi-Fi hotspot by creating the hostapd configuration file:
sudo nano /etc/hostapd/hostapd.conf
Add the following content, adjusting SSID, password and other settings as needed:
interface=wlan0
driver=nl80211
ssid=Carplay
hw_mode=g
channel=6
wmm_enabled=0
auth_algs=1
wpa=2
wpa_passphrase=wifipassword
wpa_key_mgmt=WPA-PSK
rsn_pairwise=CCMP
country_code=US
max_num_sta=5
Note
Replace values of interface with your wireless interface, ssid with network name and wpa_passphrase with wifi password
- interface - Specifies the wireless interface used for the access point
- driver - Select driver for wireless device, nl80211 is standard for modern Linux wireless devices and supports most Wi-Fi chipsets
- ssid - The network name broadcasted by the AP
- hw_mode - Operation mode, 802.11g is compatible with most of devices.
- channel - Wifi channel number in the 2.4 GHz band
- wmm_enabled - Controls Wi-Fi Multimedia (WMM), which prioritizes traffic for better Quality of Service (QoS)
- auth_algs - Authentication algorithm. Bit field: 1: WPA, 2: WEP, 3: Both.
- wpa - Select WPA security protocol version
- wpa_passphrase - Wi-Fi password (must be 8–63 characters)
- wpa_key_mgmt - Key management algorithm for WPA, PSK is suitable for small networks
- rsn_pairwise - Select encryption for WPA, AES-CCMP is secure and standard
- country_code - Specifying the country code ensures compliance with local Wi-Fi regulations
- max_num_sta - Limits the number of connected clients
Create a script to start and manage the Wi-Fi access point:
sudo nano /opt/scripts/enable_ap.sh
The script will enable Wi-Fi, stop any existing connections, and set up the Wi-Fi access point address according to our configuration to 10.0.10.1. It then starts the DHCP service to assign client IPs in the range 10.0.10.2 to 10.0.10.20. The & at the end of each start command runs the service in the background in separate process, allowing the script to continue without blocking. Add the following to the file:
#!/bin/bash

echo "> Stopping services"
sudo rfkill unblock wifi
sudo killall hostapd dnsmasq wpa_supplicant

echo "> Setting static IP on wlan0"
sudo ip link set wlan0 down
sudo ip addr flush dev wlan0
sudo ip addr add 10.0.10.1/24 dev wlan0
sudo ip link set wlan0 up

echo "> Starting dnsmasq"
sudo dnsmasq --interface=wlan0 --bind-interfaces --dhcp-range=10.0.10.2,10.0.10.20,255.255.255.0,12h &

echo "> Starting network services"
sudo systemctl start ssh.service

echo "> Starting hostapd"
sudo hostapd /etc/hostapd/hostapd.conf &
Note
Replace wlan0 with your wireless interface
Finally, make the script executable with:
sudo chmod +x /opt/scripts/enable_ap.sh
Connect to WIFI with WPA Supplicant
For wifi connection we will use same wpa_supplicant configuration that we created on step 3. Create the script to run wpa_supplicant manually.
sudo nano /opt/scripts/connect_wifi.sh
Put the following into the file. The script will activate wifi, stop any active wifi connections, connect to wifi using wpa_supplicant and start service that sync time with NTP server.
#!/bin/bash

echo "> Stopping services"
sudo rfkill unblock wifi
sudo killall hostapd dnsmasq wpa_supplicant

echo "> Resetting wlan0"
sudo ip link set wlan0 down
sudo ip addr flush dev wlan0
sudo ip link set wlan0 up

echo "> Starting wpa_supplicant"
sudo wpa_supplicant -B -i wlan0 -c /etc/wpa_supplicant/wpa_supplicant-wlan0.conf

echo "> Starting network services"
sudo systemctl start systemd-networkd.service
sudo systemctl start systemd-timesyncd.service
sudo systemctl start ssh.service
Note
Replace wlan0 with your wireless interface, replace wpa_supplicant-wlan0.conf with wpa supplicant configuration created on step 3
Finally we need to make script executable and disable automatic start of wpa_supplicant, timesync, networkd and ssh services cause we will run them manually now
sudo chmod +x /opt/scripts/connect_wifi.sh
sudo systemctl disable systemd-timesyncd.service
sudo systemctl disable wpa_supplicant.service
sudo systemctl disable wpa_supplicant@wlan0.service
sudo systemctl disable systemd-networkd.service
sudo systemctl disable systemd-networkd.socket
sudo systemctl disable ssh.service
sudo systemctl disable systemd-rfkill.service
sudo systemctl mask systemd-rfkill.service
Enable SUDO in scripts
Our scripts are using SUDO which require elevate permissions. Thats require to enter password, but we want to run scripts from non-console. So we need to configure our user to run sudo commands without password. There is a way to configure certain commands only, but simple (and less secure) way is to enable everything.
Warning
This might be already enabled on Raspberry Pi OS, so check if you can run those scripts without password
Create extra configuration for /etc/sudoers
sudo nano /etc/sudoers.d/010_pi-nopasswd
Put this into the file. Enable your user to execute all sudo commands without password
carplay ALL=(ALL) NOPASSWD: ALL